Saturday, March 1, 2014

   The mechanical fuel pump on my Travco's Kohler generator went out and neither a mechanical replacement (A-241196) nor a repair kit (241197) is available. Electric replacements are available, but I want to keep it close to “stock.” I bought a used one on ebay, but the valves in it were bad. So I was in search for replacement parts and found that Airtex 572 (fits a 1966 Jeep C5 I4) has the parts needed to rebuild the innards of the pump. The top half is a direct replacement, but the base will need to be cannibalized for the diaphragm, spring and oil seal to be installed in your existing fuel pump. Note that if you don't care about having a priming lever, you can just move your old outer arm to the new unit.

   On the new 572 pump, remove the spring between the outer arm and body. Remove the 6 screws securing the two halves, holding the two halves together by hand until the last screw is removed.
Set the top half aside. Using a hammer and punch, drive-out the pin in the base enough to remove outer arm, but you may leave it in one side of the body. The outer arm should fall out, depress the diaphragm and pull the inner arm out with pliers. Remove the diaphragm, spring and oil seal (with washer) and set aside.

On the A-241196, remove the spring between the outer arm and body, note the orientation of the top to the base for later, remove the 6 screws securing the two halves, holding the two halves together by hand until the last screw is removed. Put the old top in old parts bin or metal recycling bin. Using a hammer and punch, drive-out the pin in the base enough to remove the outer arm, but you may leave it in one side of the body. The outer arm should fall out, depress the diaphragm and pull the inner arm out with pliers. Remove the diaphragm, spring and oil seal (with washer) and set aside.

   Using the A-241196 base (only because it has a priming lever, otherwise use the 572 base), I noticed the holes in the diaphragm did not line-up, so I used the A-241196 base as a template to drill new holes. Then insert the donor oil seal, washer & spring, placing diaphragm through with slot in shaft toward the opening for the arm. Depress the diaphragm and using pliers place the small arm in the slot in the diaphragm shaft (hook away from diaphragm). Turn it upside down and insert the outer arm over the inner arm and insert a temporary pin to hold it inline. Drive the pump pin back into place from the other side. Place the 572 top over the diaphragm and orient on the A-241196 base the same as originally oriented, insert the screws though the top, diaphragm and base, but only to tighten to 1 mm gap between the two halves. Depress the outer arm until the diaphragm is about even with the joint. Tighten snug, release the arm, then tighten all screws firmly. Install loosely into engine, and bump start switch until pressure is removed from outer arm to increase ease of installation. Reattach lines, check your oil in engine & air filter & check coolant. Prime the pump, start the genny and check for leaks! DONE!


Remove inner arm


Donor Parts

A-241196 parts

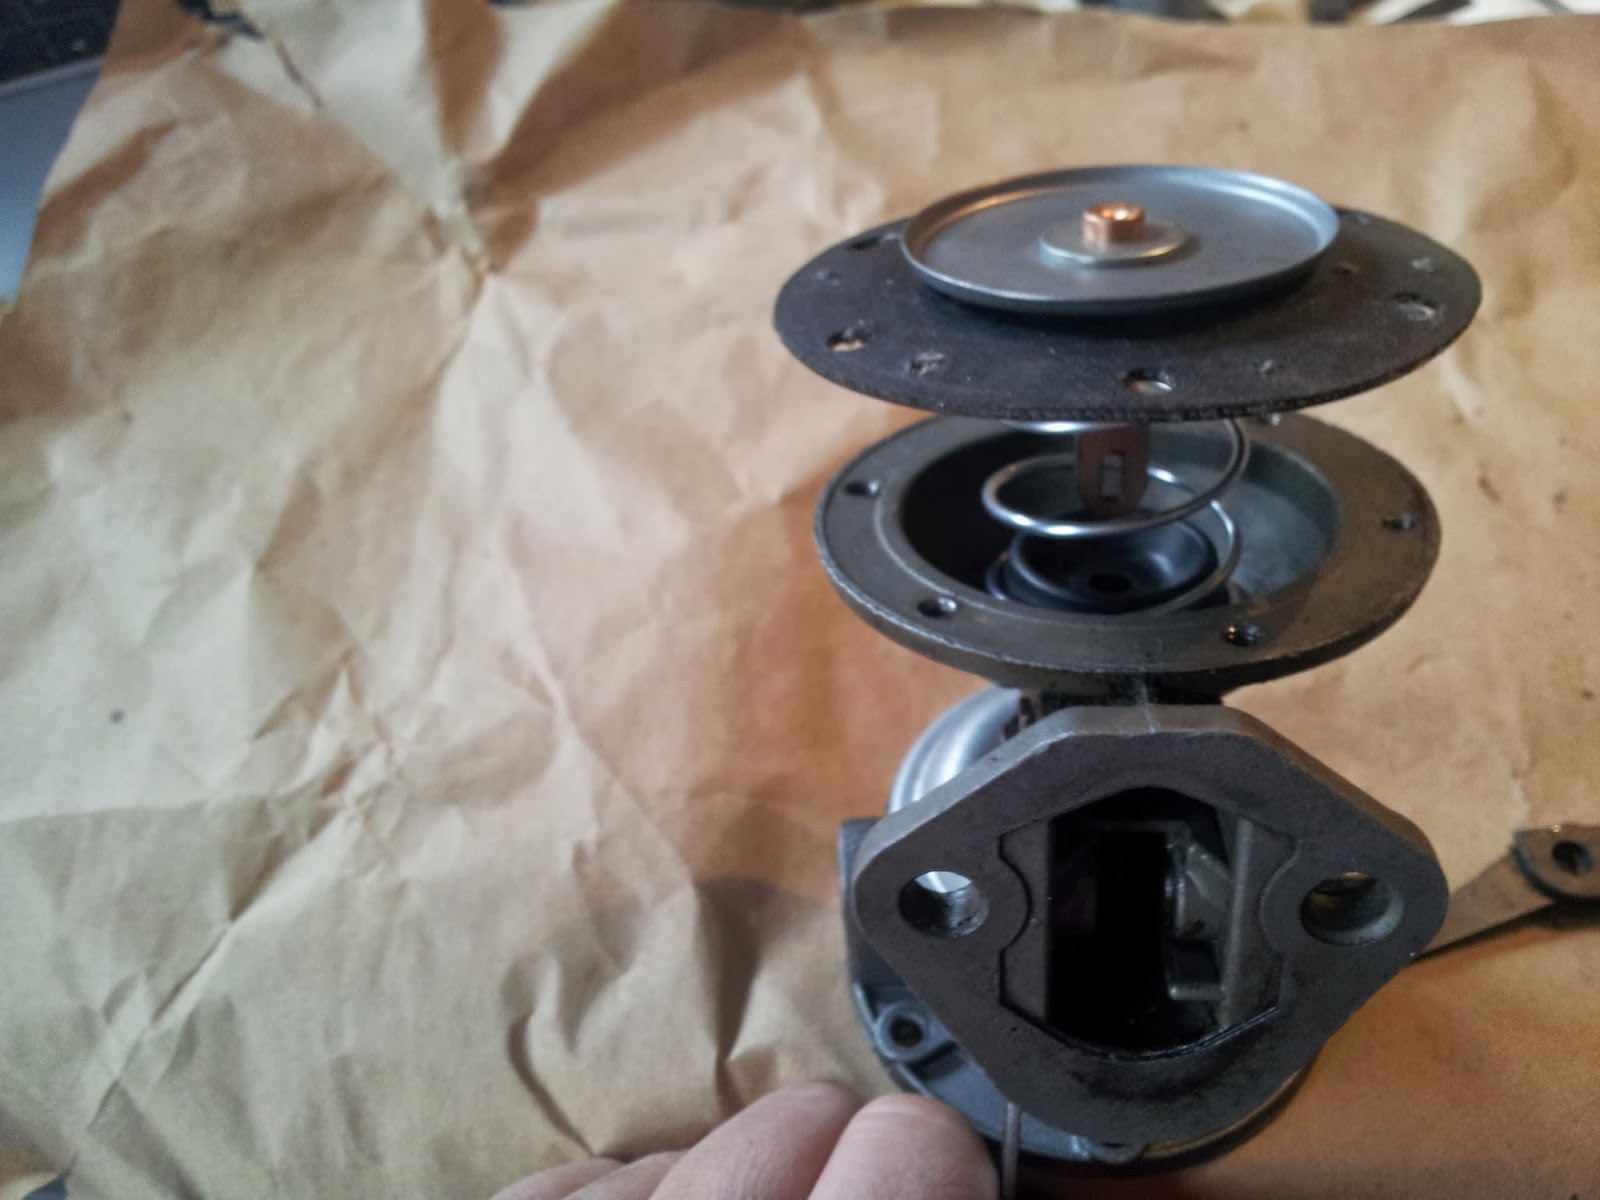
Donor parts stack-up on A-241196 base

Inner arm reinserted
Rebuilt Pump with new clear view fuel filter installed 

June Camping = Hot and Buggy

 I started this post last June and never finished it... So I am posting it now.

The other day I took a day off from working at my job, and traded it for a day of working on the Travco. On the previous camping trip it had fuel pump issues, so I wanted to look into eliminating those issues. After discovering that the electric fuel pump decided it didn't want to pump any more, I replaced it. While under the rig I happened to glance at the universal joint closest to the rear axle. It was then I discovered that one pair of bearing cups had failed and had worn through and looked like Pac-Man. Calling the local parts store with the chassis model actually got an in-stock hit for a $15 U-joint. So I replaced it, and on down the road we went!

....Hmm yeah, and it was hot and buggy as well.

Monday, April 22, 2013

Camping Prep and Update

 Previously I read on the Travco list and now finally verified (for myself) that wheel lugs on the left side of the vehicle have left-handed threads. All of my 6-lug rims have alternating recesses and upsets on the lug holes with locating holes for the pin sticking out of the rear hubs. The bottom lug is upset, the top right is recessed. These wheels are lug centered, not hub centered. Some people may not like the split-ring rims, but I like the fact that I can take a tire off and repair a flat myself (with the help of some tools and a chain for safety). True, you can repair a tubeless tire with a plug, but inserting a plug could damage the tire more.

 I added an additional temperature gauge, one with values, a volt meter to compliment the amp meter, and in the center a fuel pressure gauge. I have an electric fuel pump and have realized I need one with more flow.

 Here is one of the SeaSense #50023755 LED dome lights that I have installed in the front cabin, but still need to replace the units in the rear. The switch has three positions, to the left is RED LEDs (0.08A), center is OFF, to the right is WHITE LEDs (0.16A). They use are sold at boating stores or online. Compare this to an #1156 bulb that is 2.1A, so using 7.6% of the power. They are a different color and not as bright, so I suggest you add these next to the existing lights, you can use one or the other or both.
 Another addition are two new 6V Trojan T-105 batteries in series for my auxiliary battery bank (replacing two 12V batteries in parallel, which was a no-no). I switch this bank in with a perko switch to the chassis as needed. I can also connect the generator battery to the chassis if it needs a boost.

Thursday, October 13, 2011

Furnace repair and beds

Last time we had the Travco out in cold weather, the furnace fan was not starting on its own and required a helping hand to get it spinning. Not good at night while you are sleeping, but luckily at the time we had shore power and electric heaters on board. Anyway, I took the blower until out, it has a universal motor in it. It works on either AC or DC, so regardless which way you supply power it always turns in the correct direction. Unless of course the brushes are stuck. As the oil for the bearings got old, it got sticky. Apparently in the past someone had over oiled the motor, and so the oil had made its way to the brushes and as it got old and sticky it gummed them up so they would not advance and maintain contact with the commutator. So I cleaned the brushes and their tubes and hopefully I am good to go for another 44 years! Oh, just as a note, one of the brushes had the following number on it, 2189. might be a part number? Anyway, I plan to take the rig out in the next month to go camping at Devil's Den. I am going to remove one of the two counter tops, the one behind the driver and put a homemade tri-bunk in its place. I have ordered three 30x72" foam mattresses. I am going to cut down bed frame rails donated from family and weld or bolt them together. Can't really start building until I get the mattresses.

Sunday, September 4, 2011

Storage for Genny


It has always been my procedure to run an engine's carb bowl out of fuel if possible, before storing for a period of time.
Motorcycles, lawnmowers, even the 440 on the Travco. (I turn the electric fuel pump off an wait the minute or two for it to die)

I was going to put a shut-off valve on the Kohler to do so, until I realized I could run the genny, pull and hold-up the priming lever on the fuel pump until it died from fuel starvation. I thought I would share this with those fellow Kohler L600/L654 owners. Don't forget to return the lever to the normal lowered position when done.

Saturday, July 2, 2011

'66 Travco (California) & '67 Travco AC Electrical Wiring

I have posted some pictures here of how our two Travcos have input power connected to them.
Both Travcos have Kohler 6.5C63 6.5KW water-cooled generators.

The '67 has a 240VAC 4 pin receptacle on the genny and the Travco has a 4 pin plug to insert into it.


The '67 plugged into the Kohler genny.


The worse for wear power cord receptacle to plug the '67 RV into "park" power. The other end of the cord should be a standard 30 amp 3 pin RV style plug. Not shown is that the two 120VAC legs of the receptacle are shunted together.

The '66 built for California has a lockable compartment on the side opposite the generator to access the power connections.


The 3 pin twist-lock plug from the generator (240VAC) and the power input receptacle in the background on the '66. (120V leg, 120V leg, neutral, case is ground)


The '66 with a 30 amp park power cord inserted. Not shown is that the two 120V legs are shunted together inside the plug. (Generator output cord laying beside it)


The end of the 50 amp cord for the '66 that I made. This end matches 50 amp park service.


Ideally, the 3 pin twist-lock on the '66 should be replaced with a proper 4 pin twist-lock that has separate neutral and ground. Then you could use the 4 wire, 4 pin 50 amp cord to connect to a 50 amp park power outlet. If wired like the '67 it would have a 4 pin receptacle to match the RV's plug.

Saturday, November 13, 2010

Winterizing

Well, the time finally came to winterize my Travco. It is fairly simple to do so...
For the curious, read on.
I remove the city water inlet plug to allow the water to drain from it to the check-valve, replace cap later. My fresh water tank does not have a drain, so I have to pump it out, I should probably add a drain to it. After it is empty, I open the drain on the water heater and open all the faucets. After that is complete, I switch the valves on the water heater to bypass, switch the intake valve to the jug-inlet, and attach the hose that goes to the anti-freeze jug. I close all the faucets but the kitchen cold and turn on the pump until I get anti-freeze, close the cold, open the hot, etc. Same with the bathroom sink, but I flush the shower hose as well. I also make sure enough goes down the traps to dilute/displace any water. With all faucets closed, I allow the system to pressurize to take on a total of 1/2 gallon of anti-freeze. I have to make sure my accumulator gets filled/diluted as well. Then I relieve the pressure in the system with a faucet. I have a monomatic toilet, so I just make sure it has dumped to the tank. Lastly I make sure the grey/black water tank is drained.